In the landscape of digital music production, Ableton Live has emerged as a powerhouse software, popular for its intuitive design and flexible workflow. However, its capabilities are not confined to the digital realm.
By integrating hardware such as MIDI controllers, audio interfaces, and even external synthesizers, you can truly tap into the potential of this dynamic digital audio workstation.
How do I use Ableton with hardware?
To use Ableton Live with hardware, you need to connect your MIDI controller or audio interface to your computer and then select the appropriate input and output settings in Ableton’s Preferences menu. From there, you can create and assign tracks to send and receive audio or MIDI data to and from your hardware.
Let’s discuss the process of incorporating hardware into your Ableton Live setup.
Whether you’re a seasoned sound engineer seeking to optimize your rig or a beginner eager to elevate your musical creations, you’ll find valuable insights on using Ableton Live with hardware and how to exploit the unique advantages of both the digital and physical aspects of music production.
Do I Need Hardware For Ableton?
Ableton Live is a digital audio workstation (DAW) that you can run on a computer, so you do need some hardware, but it’s primarily computer hardware. Here are the basic hardware requirements:
- Computer: Ableton Live 11 requires at least a multi-core processor and 8 GB of RAM, though 16 GB is recommended. The software is compatible with both Windows and macOS. For Windows, you need Windows 10 (Build 1909 and later), and for macOS, you need macOS 10.13 or later.
- Storage: Ableton Live itself requires about 3 GB of hard drive space, but you’ll need more for your projects and additional sound libraries. A fast SSD (solid-state drive) is recommended for better performance.
- Audio Interface: While not strictly necessary, an audio interface can provide better sound quality and lower latency than your computer’s built-in sound card. It also allows you to connect microphones, instruments, and studio monitors.
- MIDI Controller: Again, not strictly necessary, but a MIDI controller (like a keyboard, pad controller, or control surface) can greatly enhance your ability to compose and perform music in Ableton Live.
These are the minimum requirements and depending on your specific needs and the complexity of your projects, you might need a more powerful computer, additional storage, or other hardware.
If you’re working with a lot of audio tracks, plugins, or virtual instruments, for example, you might benefit from a more powerful processor and additional RAM. If you’re recording instruments or vocals, you might need microphones, stands, cables, and other recording gear.
Finally, you’ll also need a good pair of headphones or speakers to accurately hear what you’re working on. A dual monitor setup can also be very useful for music production, though it’s not necessary.
How Do I Use Ableton With Hardware?
Ableton Live is designed to integrate with a variety of hardware, including MIDI controllers, audio interfaces, and more. Here’s a general guide on how to set up and use some common types of hardware with Ableton Live:
- Audio Interface
- Connect your audio interface to your computer usually via USB, Thunderbolt, or Firewire.
- Open Ableton Live. Go to the “Options” menu and then to “Preferences”.
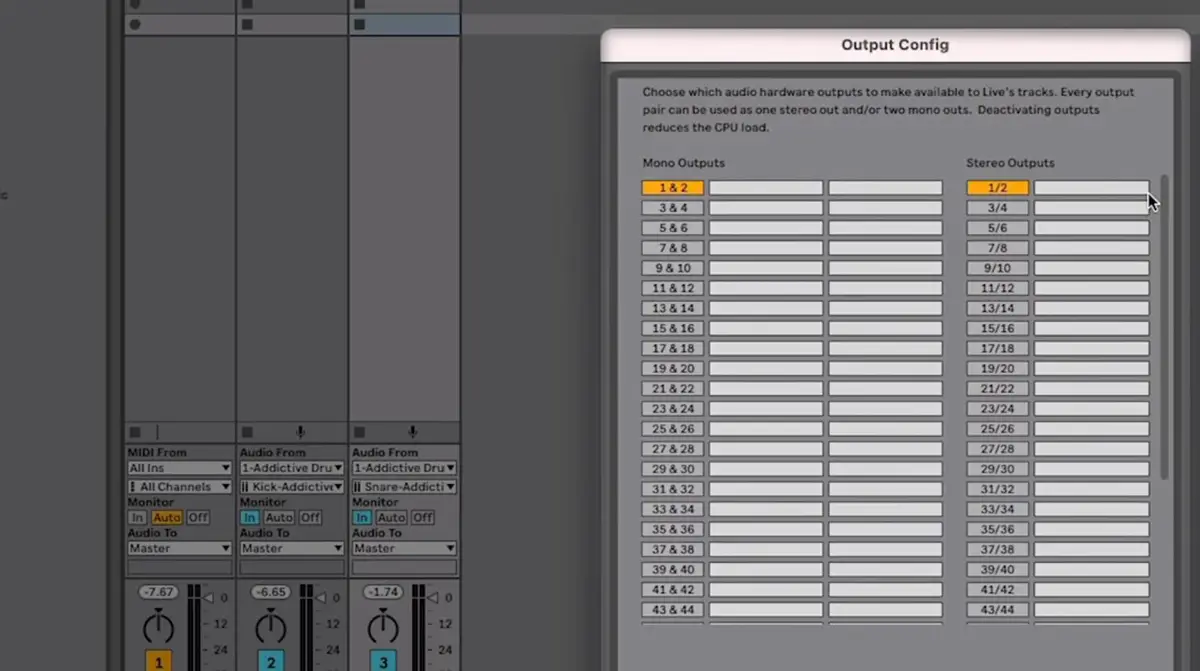
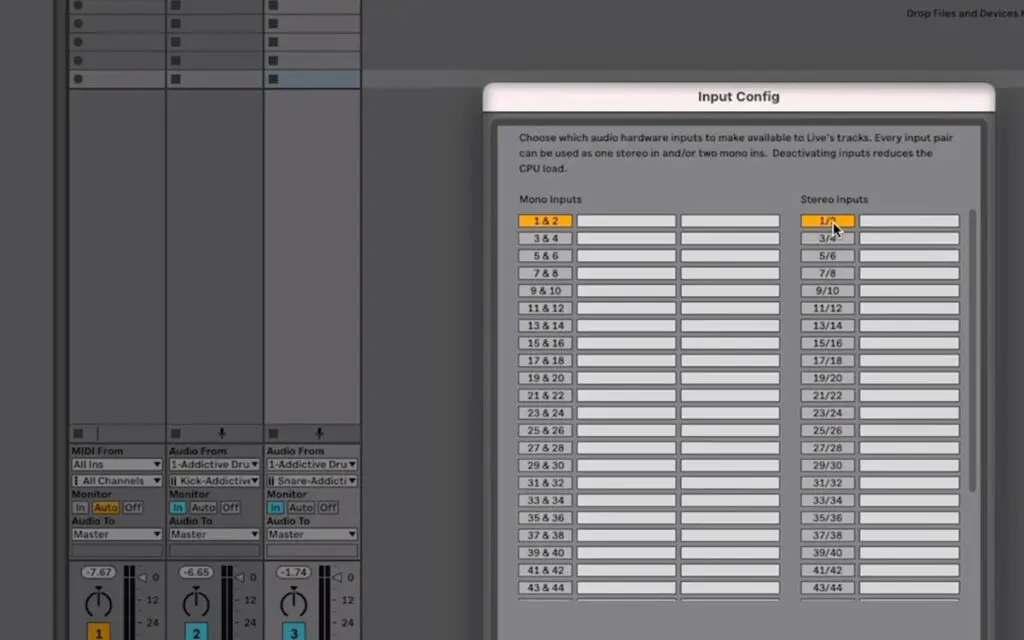
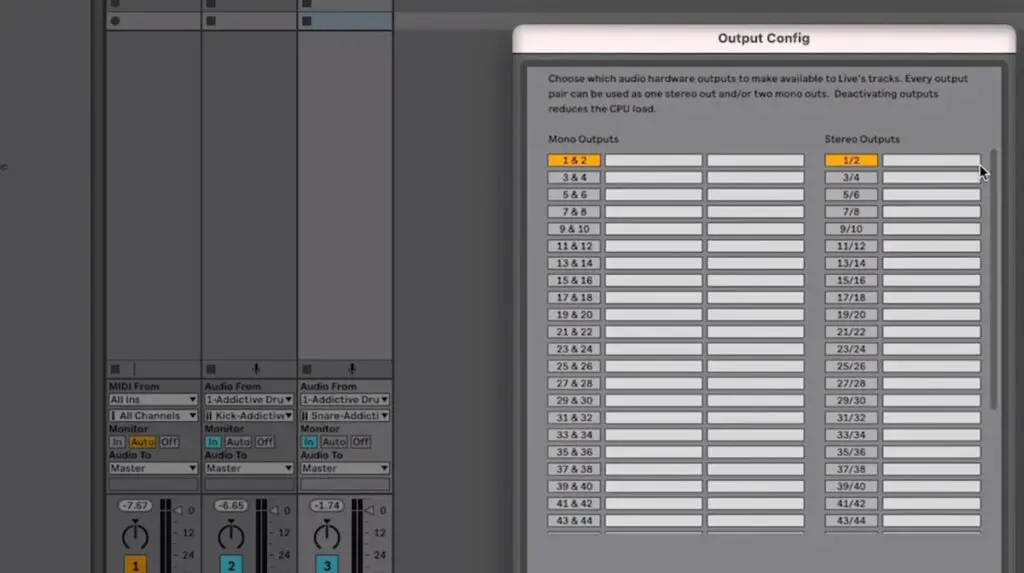
- In the “Audio” tab, select your audio interface as the Audio Input Device and Audio Output Device.
- If you’re using an audio interface, you can connect microphones or instruments to the interface’s inputs and studio monitors or headphones to the interface’s outputs.
- MIDI Controller
- Connect your MIDI controller to your computer. This is typically done via USB, but some older controllers use MIDI cables and may require a separate MIDI interface.
- In Ableton Live, go to the “Options” menu and then to “Preferences”.
- In the “Link/MIDI” tab, you should see your MIDI controller listed in the “MIDI Ports” section. Enable “Track” and “Remote” for the input of your MIDI controller. This allows you to play and record MIDI notes and to control Ableton’s parameters with the knobs, sliders, or pads on your controller.
- Each MIDI controller is different, and you might have to do some additional setup to fully integrate it with Ableton Live. Many controllers come with Ableton Live scripts or presets that make this process easier.
- External Synthesizers or Drum Machines
- If you’re using an external hardware synthesizer or drum machine, you can connect it to your audio interface’s inputs to record its sound and/or to your MIDI interface or MIDI controller’s MIDI out to control it with MIDI from Ableton Live.
- In Ableton Live, you can create a new Audio track to record the sound from your hardware or a new MIDI track to send MIDI to your hardware.
These are general instructions and might vary depending on the specific hardware you’re using. Always refer to the user manuals of your hardware and Ableton Live for the most accurate information.
How Do I Use An External Synth In Ableton?
Connecting and using an external hardware synthesizer with Ableton Live involves two main aspects: sending MIDI data to the synth to control it, and recording the audio that the synth produces. Here’s a step-by-step guide:
- Connect Your Synth to Your Computer or Audio Interface
You’ll need to connect the audio outputs of your synth to the audio inputs of your audio interface. This is usually done with 1/4″ audio cables.
If you want to send MIDI data from Ableton to your synth, you’ll also need to connect the MIDI Out port of your interface (or your computer, if it has one) to the MIDI In port on your synth. This is done with a MIDI cable. Some modern synthesizers can also receive MIDI data over USB, in which case you would connect the synth to your computer with a USB cable. - Set Up Ableton Live
Open Ableton Live and go to “Preferences” (under the “Options” menu on Windows, or the “Live” menu on Mac). In the “Audio” tab, ensure that your audio interface is selected as the audio input device.
If you’re sending MIDI data to your synth, go to the “Link/MIDI” tab and enable “Track” for the MIDI port that’s connected to your synth. This allows Ableton to send MIDI notes and control data to your synth. - Create a MIDI Track
Create a new MIDI track (Ctrl+Shift+T or Cmd+Shift+T). This track will send MIDI data to your synth. In the “MIDI To” section of the track, select the MIDI port and channel that your synth is connected to. Now, any MIDI clips or notes that you put on this track will be sent to your synth. - Create an Audio Track
Create a new audio track (Ctrl+T or Cmd+T). This track will record the audio from your synth. In the “Audio From” section of the track, select the audio inputs that your synth is connected to. Set the “Monitor” mode to “Auto” or “In” to hear the synth.
When you want to record the synth, arm the audio track (click the record button on the track) and press the global record button at the top of the screen. Ableton will record the audio from your synth onto the track.
These are general instructions, and the exact process can vary depending on the specific synth and audio interface you’re using.
Conclusion
Through our exploration of Ableton Live’s integration with hardware, we’ve unveiled the immense potential that lies in the fusion of digital and physical music production.
Harnessing the power of MIDI controllers, audio interfaces, and external synthesizers with Ableton Live not only enhances your control over your music but also offers a tactile, immersive experience that purely digital production can’t replicate.
Whether you’re manipulating sound waves on a synth or crafting intricate beats on a MIDI drum pad, the tactile feedback and control nuances offer a deeper connection with your music.
As we have seen, integrating hardware with Ableton Live can seem complex at first, but with a clear understanding of the processes and a little practice, it becomes second nature.
So, don’t shy away from incorporating that new synth into your setup or optimizing your audio interface for Ableton Live.
The beauty of music lies in exploration and experimentation. So, dive in, experiment, and let your creativity flow unbridled. By bridging the gap between hardware and software, you’re not just making music; you’re crafting a unique sonic experience. Happy music making!